We’re thinking of moving in the next few months so most people would think it’s a bit silly to attempt a bathroom makeover now. Even if I only get to enjoy this for 2 months, it’s still worth it and better than the blank wall that was there before! This DIY is really easy and is non-permanent and easy to remove so it’s perfect for renters.
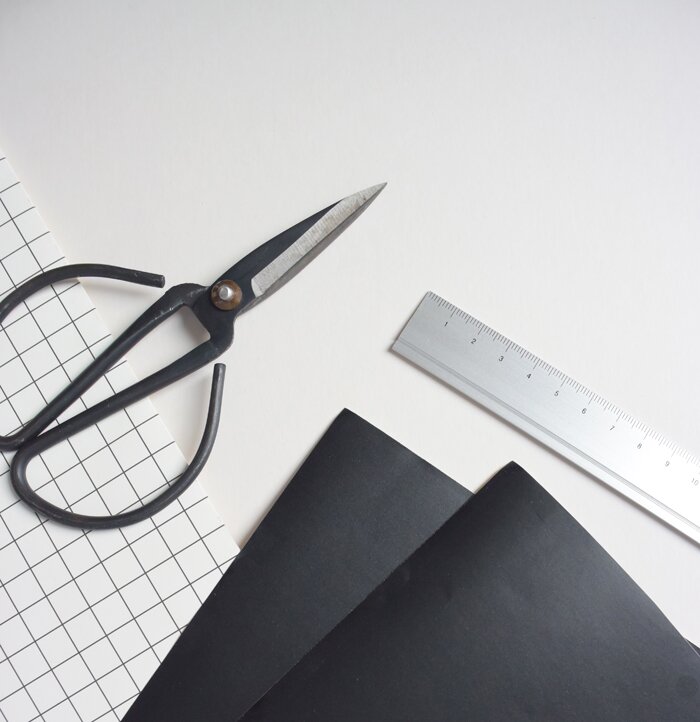
You will need
Sheets or roll of sticky back plastic / self adhesive vinyl (I used 2 A4 sheets of black matt vinyl)
Craft knife / scissors
Cutting surface
Ruler
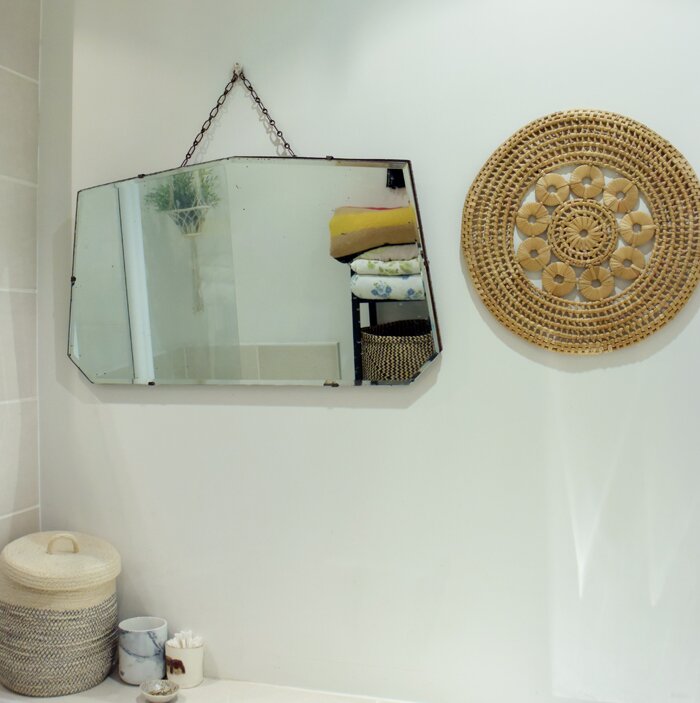
Here is how the wall looked before. It’s a small bathroom, with no natural light (hence the terrible photos!). It’s a new build, so everything is very modern but white and BEIGE. I wanted to create a feature wall, on the wall which we see and use most.
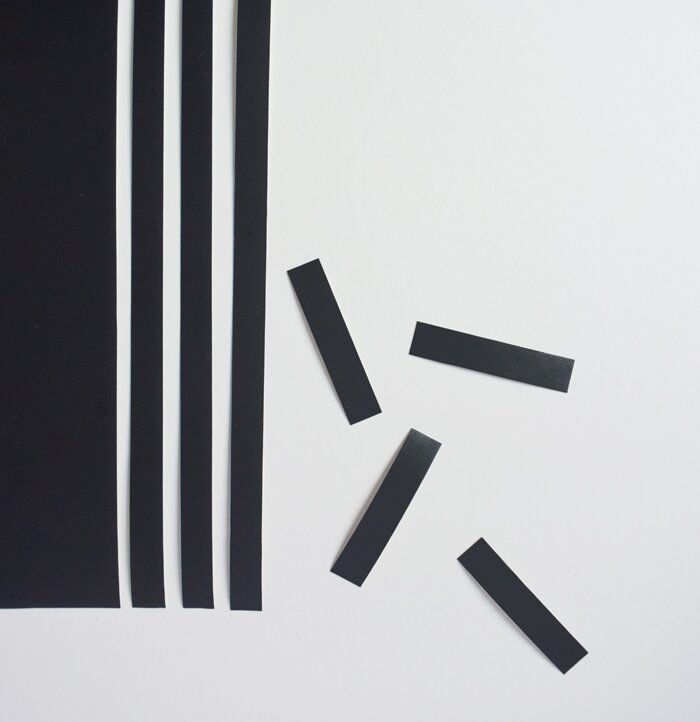
Using your ruler and scissors / craft knife, cut your vinyl into strips and then cut into equal, smaller strips. My strips measure 6cm x 1.2cm. Once you have a nice big pile of confetti, it’s time to decorate your wall.

Wipe down the wall surface first to make sure it’s clean and dust / dirt free. Arrange your confetti in a random arrangement, trying to keep them all quite evenly spaced. But if you’re not happy with the placing of your confetti, simply remove and re-stick. Keep going until you’ve filled your wall. I got so far standing but then got on a stepladder to finish the top half.
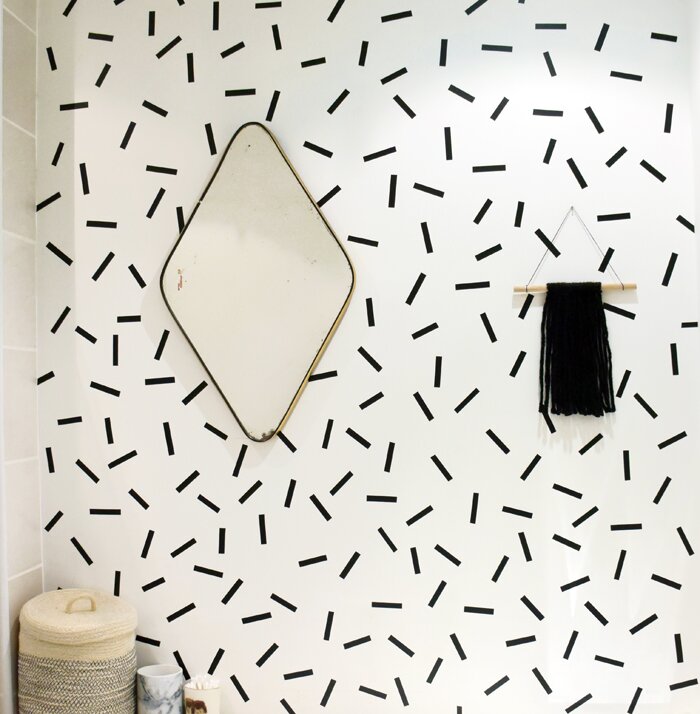
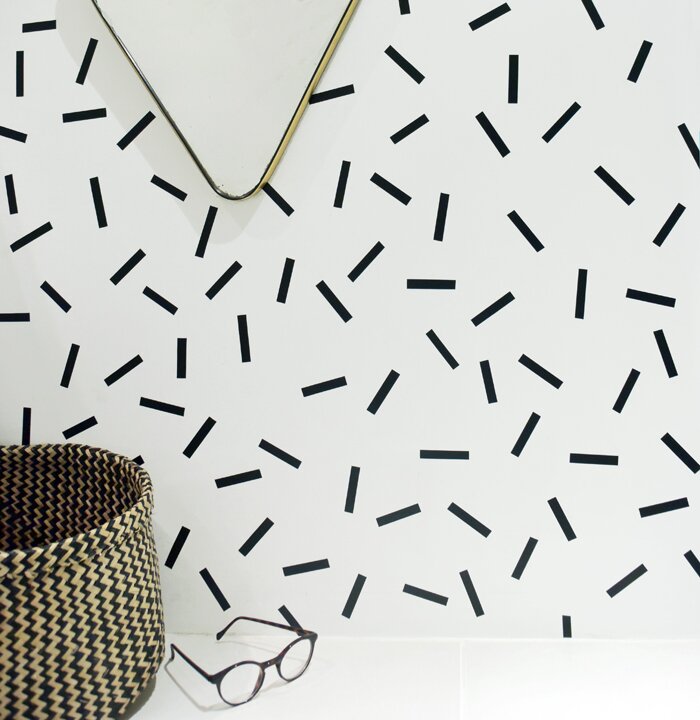
I’m really happy with the finished wall. It’s something a little more interesting in what was a really dull space (it’s a bathroom, how exciting is it going to get?). And I think the pattern actually helps me wake up in the morning when I see it. How removable the vinyl is will depend on the surface of the wall. Always do a test first to make sure you will not damage your paintwork! I chose black vinyl to try to dampen down the beige bathroom vibes but I’d love to try a multi-coloured confetti pattern somewhere.
0 Comments
1 Pingback